Dabao evaluation board for baochip-1x
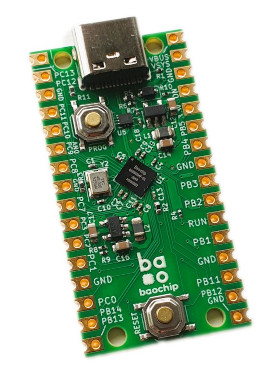
Intro
The Dabao is an evaluation board for baochip-1x, a RISC-V (RV32IMAC) with 4 PicoRV32 cores (RV32EMC) running at 700MHz called BIO, to compete with PIO (Programmable I/O) of Raspberry Pico.
Another feature is being open source, providing RTL sources.
Links
Programming and Flashing
The chip has two boot modes:
boot0- this is burned into the chip so it cannot be changed; it will runboot1boot1- ifbootwaitis disabled, it runs the user code; otherwise it initializes the USB and mounts it as a filesystem, and also initializes the UART
Once you compile your code, it first needs to be signed in order to work, and after that it is converted into a UF2 file.
After that you can upload through two methods:
UART USB- once connected to USB it will add a new TTY device that can be used to upload the codeUART- an alternative is to use pinsTX (PB14)andRX (PB13)at115200baud to connect
This serial interface allows commands; one you can test is audit, which will print information about the chip:
Board type reads as: Dabao
Boot partition is: Ok(PrimaryPartition)
Semver is: v0.10.0-61-g5397e1b48
Description is: bao2-0
...
You can upload with uf2 {BASE64_BLOCK512}, but of course it is easier to use a tool like this: https://github.com/ArmstrongSubero/dabao-sdk/blob/main/tools/serial_flash.py
Or you can just copy the UF2 file onto the device connected through USB with the name BAOCHIP, for example in Ubuntu: cp build/blink.uf2 /media/USERNAME/BAOCHIP/
After uploading, you need to run the boot command on the device; this is handled through UART, so for example:
minicom -b 115200 -D /dev/ttyACM0
boot
When you do this, the UART will be unresponsive, because the system now executes the uploaded code. Alternatively, you can press the PROG button to do the same.
Once you upload, if you press the RESET button, the chip will go back into boot1 mode and will discard the uploaded code, so it will be ready to accept a new code upload.
If you want to keep the uploaded code between resets, you can disable the bootwait with the command
bootwait disableor enable it:
bootwait enableIf you want to go back into boot1 after disabling bootwait, then you need to:
- press and hold
PROGbutton - press
RESETbutton and release - keep pressing
PROGfor at least 1 second - release
PROG
With this, the chip will be ready to be programmed.
Links
Dabao SDK
This is the best option to program with, as it uses the usual C code and is similar to other embedded projects.
git clone https://github.com/armstrongsubero/dabao-sdk
cd dabao-sdk
# setup gcc
wget https://github.com/xpack-dev-tools/riscv-none-elf-gcc-xpack/releases/download/v15.2.0-1/xpack-riscv-none-elf-gcc-15.2.0-1-linux-x64.tar.gz -O - | tar zxvf  -

# setup python
python3 -m venv venv
source ./venv/bin/activate
pip3 install pyserial pure25519

# allow main command
chmod +x ./bao_flash.sh

# build blink example (will use examples/ folder)
./bao_flash.sh build blink

# flash to device (will use build/ folder)
./bao_flash.sh flash /dev/ttyACM0 blink

# alternative: use directly the flash tool
python3 tools/serial_flash.py /dev/ttyACM0 build/blink.uf2
The blink code will toggle PB1 pin, so LED can be connected to PB1 and GND or 3V and PB1. Note there is no LED in board.